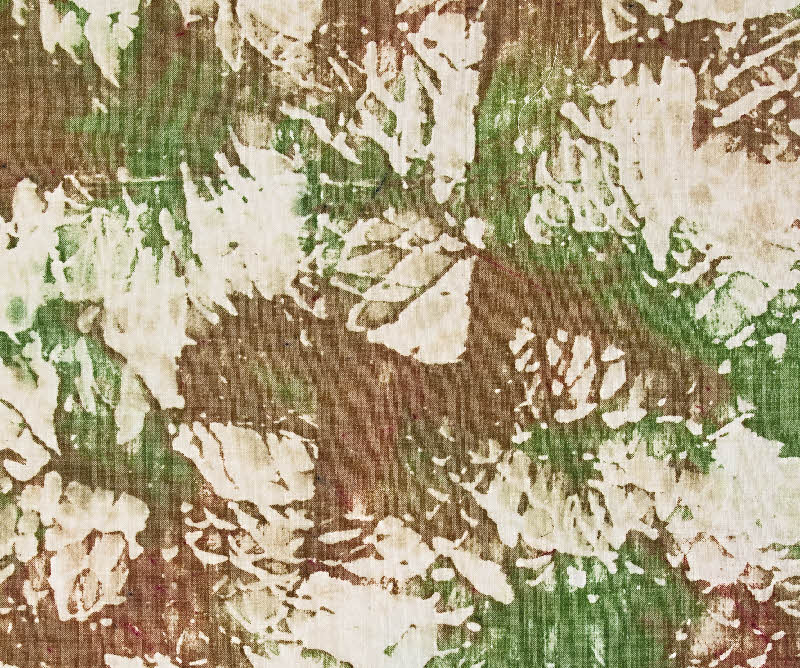
Showing posts with label resist techniques. Show all posts

Tuesday, January 22, 2013

Screen Printing with Stencils, Part Two

Last week I showed you some of the screen printing stencils I created with interfacing and acrylic paint. Today I have photos of stencils I created using resists. I use resists on silkscreens quite often. It is a great way to do deconstructed or breakdown printing, because as you apply the wet medium, the resist breaks down, changing the pattern as you work.  That can be a disadvantage, however, if you want a particular design and don't want the breakdown to occur. That's where the stencils come in.  I thought it would be a good way to create a design that can be used indefinitely. The resist is applied to the stencil. When it dries, paint is applied over the open areas. Then the resist is washed off, leaving behind a pattern.

A little warning: the process is not for the faint of heart. Depending on which resists you use, it can be difficult to wash the resist out of the interfacing. I found flour paste and mashed potatoes particularly difficult to remove. It is also more time consuming than just applying paint to the interfacing. Depending on which resist you use, it can take 2 or three days to complete a stencil. Not good for those who want instant gratification.

If you want to try this yourself, two things to keep in mind.  First, the thickness of the interfacing does matter.  I prefer medium weight. Very thin interfacing becomes fragile when wet and tears easily.  Heavy weight interfacing absorbs so much dye or paint that it is hard to get a good print. Second, you may need to use several coats of paint to completely block the interfacing. 

The first stencil was created by applying flour paste resist with a spring whisk. The areas which had the flour paste become the open areas that the paint or dye goes through.

Flour paste resist


For this stencil, flour paste was applied to the entire piece of interfacing. Then a wire whisk was pressed into the flour to remove some of the paste.


The last flour paste sample I created is shown below. I applied flour paste to the entire piece of interfacing, then used a window chamois to remove some of the flour paste. The three stencils form a nice suite, don't you think?


Soy wax is a bit easier to wash out than flour paste. The stencil below was created by stamping the wax on the interfacing with a square sponge.


It is a bit difficult to see the above design in the sample, since it was created with several layers of stencil screen prints.


This stencil is one of my favorites, although it took forever to get all the mashed potatoes washed out. I applied instant mashed potatoes over the entire piece of interfacing. When it dried, the potatoes cracked into large chunks.


Have you tried  interfacing screen printing stencils? What were your results?

Thursday, August 16, 2012

A Change of Heart

I'm trying something new this fall - teaching online classes.  I thought about doing so two years ago, but the perfectionist in me asked "How could this be of value without face to face interaction?"  A few things have contributed to my change of heart.  I have come to recognize the power of connecting and communicating online. As I have become more involved online, I have developed friendships with people that are more meaningful than I would have thought possible. Sure, nothing can compare with being together in person, but when you can't do that, online connections are great.

I have taken some online classes and I like the self study aspect. It's great to be able to fit something into my schedule and not have to worry about being in a certain place at a certain time.  And the cost is also a big draw.  I can take an online workshop with a well known instructor for a lot less than going to a workshop in person (plus no travel costs!)

So, I'm taking the plunge.  This fall I'm offering two classes: a version of my resist class that focuses on resists from the pantry and a class on African inspired cloth, which focuses on the use of adinkra symbols.  You can read more about the classes on my website. If you are thinking about giving an online class a try, I'd love to have a few friendly faces in the inaugural group!

Thursday, August 9, 2012

Something New

Earlier this summer I did a lot of screenprinting with dye and have many pieces in the works.  I finally finished one! It incorporates multiple layers of screenprinting with dye, screenprinting with paint, soy wax resist, hand stitching and metal leaf.


Now Points, 36" x 18", Cotton

I had a great time stitching the french knots. Lots and lots of single, double and triple french knots. I'm guessing there have to be at least 250 of them.This is one of those cases where I could easily have been carried away in the stitching.  I didn't want to stop! 


Now Points, detail
This piece was inspired by a quote I came across last year.

Time is not a line, but a series of now-points.
- Taisen Deshimaru


Wednesday, August 1, 2012

Sugar Syrup Tutorial and Fabric Giveaway


Just a reminder - today I'm a guest on the And Then We Set It On Fire blog.  I'll be sharing information on using sugar syrup as a resist and I'll be giving away a sample set of resist-dyed fabrics.

Visit the Fire blog to download the tutorial and enter the drawing.

Thursday, July 26, 2012

A Month-Long Resist "Fest"!

If you haven't read the blog, And Then We Set It On Fire, you are missing out.  It is hosted by a group of fiber artists and each month they focus on a particular technique. For the month of August, they will explore the use of resists. They are also giving away a copy of my book, Visual Texture on Fabric (courtesy of C&T Publishing). To enter the drawing, leave a comment by July 31on the blog post linked below:

http://andthenwesetitonfire.blogspot.com/2012/07/give-away-for-augusts-technique-of-month.html

On August 1, I'll be kicking off the month of resists on their blog with a sugar resist tutorial. Plus I'll be giving away a sample set of resist-dyed fabrics.  See you there!

Tuesday, June 12, 2012

Working with Resists - Tip #7

This week I'm winding up my resist Tuesdays series with my final tip - Have fun!  Isn't that why we create? Yes, we are expressing ourselves, adding beauty and/or meaning to the world and perhaps even healing ourselves in the process.  The time spent exploring and playing with new techniques allows us to do those things even better.

I hope that these posts over the past two months have inspired you to try working with resists. I would love to hear about your experiments. And if you are inspired to buy my book and try out the techniques, that's great, too! Please bear with me for a moment of shameless self promotion.  My book will be available next week (finally!) My shipment is on a FedEx truck at this moment, headed to San Antonio. I created eight silk scarves for the book using the different resist techniques. Anyone who orders the book from me before the end of June is automatically entered into the drawing. Below are photos of some of the scarves.

Happy Resisting!


Tuesday, June 5, 2012

Working with Resists - Corn Dextrin

Corn dextrin is a great all-purpose resist.  It is very versatile - you can stamp it, screen print it, stencil it, brush it.  It looks a lot like potato dextrin when mixed, however it doesn't crack once dry.  If you have tried working with cornstarch, it is similar, however I find it easier to mix. As with most resists, a heavier coating ensures a stronger resist.  Here are a few photos of cloth created with corn dextrin.


Corn dextrin works great with stencils. It is just the right consistency to spread with a scraper.


I love using the free-form "drip" approach. I guess this piece is more structured than free-form, but you get my point.


This piece reminds me of pine cones.  The dextrin was brushed through a lacy cloth. You can see the lighter areas where the brush (fully loaded with dextrin) brushed over the cloth.  And the areas with more definition when there was less dextrin on the brush.


Brayer printing deposits a lighter coating of the resist, so it has a softer effect.  This piece was brayer printed over a textured mat.


Here's another brayer print, over the ubiquitous bubble wrap. Again, a nice soft effect.

How have you used corn dextrin?

Read my tips for working with resists

Read about working with sugar syrup

Read about working with acrylic medium

Read about working with flour paste

Read about working with oatmeal

Read about working with potato dextrin

 Read about working with soy wax

Read about working with commercial resists


Tuesday, May 29, 2012

Working with Resists - Commercial Resists

I love commercial water-based resists for their ease of use. No mixing is involved - just open the bottle and pour! Jacquard, Presist and Inkodye are three of the many brands available. I was introduced to water-based resists years ago when I painted on silk.  I created detailed drawings with the resist and then painted inside the lines using silk dyes. When I transitioned to other surface design techniques, I didn't realize how versatile those resists can be. They go way beyond the traditional squeeze-on application.  Here are a few of my favorite ways to use them.


I love using my garden as inspiration and as a printing tool!  These are printings of rose leaves from my backyard.


I'm drawn to the soft, subtle effect of this piece. It was created by brushing water based resist through a mesh laundry bag.


Compressed sponges are the perfect stamping material.  They are very thin, which makes them easy to cut with scissors or a craft knife. Once they are placed under water, they swell to the thickness of a kitchen sponge.


Commercial resists are particularly suited to screenprinting.  The consistency is smooth and easily penetrates a silkscreen.  This is a thermofax image.


Back to the old familiar ways - the resist was applied with a squeeze bottle.

What are your favorite ways of applying water-based resists?

Read my tips for working with resists

Read about working with sugar syrup

Read about working with acrylic medium

Read about working with flour paste

Read about working with oatmeal

Read about working with potato dextrin

Read about working with soy wax

Read about working with commercial resists

Read about working with corn dextrin


Tuesday, May 22, 2012

Working with Resists - Soy Wax

For years, I was drawn to the look of batik, but I didn't want to deal with the wax removal.  When I learned that soy wax washes out with hot water, I rushed to try it. Now I keep a supply in my studio at all times. Compared to some of the other resists, it is easier to maintain the "white space" with soy wax while hand painting. It does tend to break down somewhat in an immersion dye bath, but I love the soft look that creates. Soy wax can be applied with a variety of tools or simply brushed onto the fabric. Here are some of my samples. 


See how the white background was maintained. This feature allows great possibilities for over dyeing.


Even though it is a soft wax, it will crack to create an interesting texture.


This leaf was created by applying soy wax through a stencil.  After washing out the wax, a layer of dye was hand painted on the cloth to give it a hint of color.


When layered with other resists, you can achieve much depth and complexity.


You can even use soy wax for shibori. How have you used soy wax in your work?

Read my tips on working with resists.

Read about working with sugar syrup.

Read about working with acrylic medium.

Read about working with flour paste.

Read about working with oatmeal.


Read about working with potato dextrin.

Tuesday, May 15, 2012

Working with Resists - Tip #6

#6 Understanding the Variables

One of the trickiest aspects of achieving consistency when working with resists is to understand all the factors that affect the end result. Years ago I had an early lesson in understanding variables when working with gel glue.  I made three mistakes - I applied it with a rubber stamp, I used silk noil and I immersed it.  The end result was that the stamped image did not show up at all.  Individually, those actions might be fine, but together they resulted in failure. Rubber stamps are not the most effective way to apply gel glue, particularly on a heavy fabric: a sponge stamp is a much better choice. Because gel glue is water soluble, it doesn't hold up well in an immersion. It will work with a low water immersion and a heavy layer of glue, but not with a light application on a heavy fabric.

I've had numerous lessons in what affects the end result. And I'm still learning. I'm not sure I'll ever have them all worked out, but each time I work with resists, my knowledge increases. Below is a partial list of the seemingly infinite variables. What other variables have you found in your work with resists?

Fabric
The weave or texture of the fabric affects the way an image or pattern looks.  It may also affect the ease with which the resist washes out.
The weight or thickness of the fabric affects whether the resist completely penetrates the fabric and how the dye reacts with the fabric.

The Resist
For resists that require mixing, the resist to water ratio affects not only the look but also the resist's ability to block dye or paint.
The length of time the resist sits before use may affect the crackle pattern for oatmeal and potato dextrin.
The length of cooking time (for sugar or oats) affects the resulting pattern.
Different brands of commercial water-based resists have different properties.  Some are more water soluble, some spread more on the fabric, some work well with immersion.


The Application Technique
The thickness of the application affects the resist properties - a thicker layer means the dye is less likely to breach the resist.
The thickness of the application affects the crackle pattern for paste resists.  Generally a thicker layer results in larger cracks, a thin layer results in a finer crackling pattern.

The Dye or Paint
The way the dye is applied (immersion, liquid hand painted, thickened hand painted) can create significant differences in the end result.
The consistency of the thickened dye can affect how much dye penetrates the resist.

Read previous tips for working with resists


Read tip #7 


Read about sugar syrup resist

Read about acrylic medium as a resist

Read about flour paste resist

Read about oatmeal resist

 Read about potato dextrin resist

Read about soy wax resist


Tuesday, May 1, 2012

Working With Resists - Potato Dextrin

It took a few years for me to really appreciate potato dextrin. It is best known for its distinctive crackle pattern, however I have found that it can be very versatile. It works well in a squeeze bottle, stamped or stenciled, brayer printed and even screen printed. It washes out easily but it can withstand low water immersion. The main downside is that it is more costly than other paste resists. Covering a large piece of cloth for the crackle effect can get expensive. But it does look fabulous!


Here is the classic crackle pattern. The dextrin was applied unevenly, resulting in some areas with fine cracks and some areas with larger cracks.


Potato dextrin was brushed through a plastic grid, then painted with thickened dye. When using objects as stencils, the result is not always as expected. Instead of creating neat squares, the dextrin pooled around the grid, resulting in this abstracted pattern.


Potato dextrin brushed through lace curtain, painted with thickened dye.  Prior to being used as a stencil, the lace was stiffened with a coating of acrylic paint.


Potato dextrin applied with a brush, painted with thickened dye


Potato dextrin applied with a sponge stamp, painted with thickened dye.


Potato dextrin applied with a sponge stamp, immersed.  Notice how more of the dye breached the resist, resulting in a softer image.


Potato dextrin brayer print with a chocolate box liner underneath the cloth.


Potato dextrin applied with a circular brush.


Read my tips for working with resists

Read about working with sugar syrup resist

Read about working with acrylic medium resist


Read about working with flour paste resist

Read about working with oatmeal resist

Read about working with soy wax resist

Tuesday, April 24, 2012

Working with Resists - Tip #5


Learn the characteristics of each resist

There are a host of substances that can be used as a resist and each has different properties. Some are more water-soluble than others.  Some crack when dried.  Some remain permanent on the fabric even after washing. You are more likely to be pleased with your results if you choose a resist that matches your intended application and dye technique. For example, to achieve a finely detailed image with crisp edges, a silkscreen or thermofax is the perfect tool. That eliminates using oatmeal, flour paste or soy wax as a resist, because none of them go through a silkscreen easily. Commercial water-based resists, acrylic medium and gel glue are the perfect consistency for screen printing and each will yield a slightly different result. 

The cloth below was screen printed with Jacquard water-based resist and with acrylic medium, then brushed with thickened dye.  The acrylic medium left a softer, ghostly image and the Jacquard left a more pronounced image.


This cloth was created using flour paste applied with a squeeze bottle. Many resists could have been used to create a similar effect, however flour was chosen for it's cracking properties.  The cracks add interest to the circle images.


This cloth employs both soy wax and flour paste resists.  The soy wax was applied with a stencil.  Then flour paste was applied with a rag, creating a scumble effect. After the flour paste was dry, the cloth was immersed.  The soy wax holds up better than flour paste in an immersion, so the leaves retain more of the original fabric color.


In each of these cases, the resists and dye application methods were chosen deliberately to achieve the desired affect. The bottom line - work with the properties of the resist. Don’t expect it to do something against its nature!

Read previous tips

Read next tip

Read about sugar syrup resist

Read about acrylic medium resist


Read about flour paste resist

Read about oatmeal resist

Read about potato dextrin resist

Read about soy wax resist

Tuesday, April 17, 2012

Working With Resists - Oatmeal

I first read about using oatmeal as a resist in Sue Beever's book, Off the Shelf Fabric Painting. I really liked the look, but I didn't like the cooking!  I experimented with some no-cook variations and now oatmeal is a staple in my pantry and in my art.

I'll be honest, oatmeal is a little more work than some of the other resists (primarily in the wash-out), but it creates a truly unique look.  You can achieve the signature oat-y crackle or a variety of marbled, wash effects.  I didn't realize it's versatility until I tried a few variations on the basic technique.  And of course it has the benefit of being inexpensive and readily available. The other thing I love about oatmeal is that it is very forgiving.  Almost any variation in the oats to water ratio or in the amount of time it stands before using will produce good results, as will any method of applying the oatmeal.

Oatmeal, cooked
The oatmeal was applied with a brush - note the brush strokes on the upper portion of the cloth.

Oatmeal, uncooked
Here, the oatmeal was applied with a squeegee. You can see how that technique spreads the oats out, leaving more space between them.

Oatmeal, cooked
Using a spoon to apply the oatmeal, as above, allows more control, making it easier to create a more even oat pattern.

Oatmeal, uncooked
 This oatmeal was also applied with a spoon.

Read my tips for working with resists.

Read about working with sugar syrup resist.

Read about working with acrylic medium resist.

Read about working with flour paste resist.


Tuesday, April 10, 2012

Working with Resists - Tip #4

#4 Don't Give Up

Occasionally I meet someone who says,  "I saw your article on (fill in the blank) resist, but when I tried it, it didn't work out."  There are a lot of reasons why someone may have different results than mine. So many variables come into play, and it's difficult to troubleshoot in a brief chance encounter. All I can say is that working with resists requires tenacity. (And if you do have questions about your results, I am happy to troubleshoot with you via email.  Just contact me and let me know what's happening.)

When I first started experimenting eight years ago, I gave up too soon.  I had some initial success with flour paste and potato dextrin, but as I tried to expand beyond the basics, I was not satisfied with the results.  I became frustrated and gave up (not completely, just for awhile!)  Eight years and many studio hours later, I have learned a lot.   I have learned the properties of each resist and I have a better understanding of how they respond in different circumstances. I learned that resist recipes are only guidelines.  Even a "commodity" like flour can be different among different brands. You can adjust the quantities for different results and sometimes even the weather affects the consistency of the final product! With some experimentation, you will come to know what consistency yields the results you like.

The corollary to tenacity is to leave your expectations behind.  I already talked about this, so I'll only say that a piece may not be what you expected, but it may be a great candidate for over-dyeing, discharge, stitching, piecing, or even knitting. So if you have tried some resists, but were not satisfied with the results, please don't give up!  They offer a wonderful way to add depth and texture to cloth.


Tuesday, April 3, 2012

Working with Resists - Flour Paste

I remember my first experiment with flour paste. It was in Sidney Jostes' garage in the suburbs of Chicago. We were having a resist play day and it was my first time using some of the resists.  I applied flour paste to a pole-wrapped piece of fabric.  Once dry, I unwrapped it and applied liquid dyes.  The resulting cloth was gorgeous, but some of the flour paste stuck to the cloth and I never could get it out. I learned an important lesson that day - make sure to get all of the flour residue off the cloth before you put it in the dryer.

Flour resist is great because it is very inexpensive and most of us have flour on hand, so there is no need to make a special trip to the store or place an internet order.  And you can use almost any variety.  There are subtle differences between whole wheat, all purpose and bread flour, but they all will work. (The whole wheat can be a little more difficult to remove.) I haven't tried any other grain flours (except rice), so there is a whole world of experimentation out there.

Flour resist is also very versatile.  It creates a lovely crackle pattern and it works well with most application techniques. 

Multiple layers of flour paste crackle

Flour paste leaf print

Multiple layers of flour paste resist

Rice flour resist applied with a syringe

Rice flour applied with a squeeze bottle


Peace Amidst Chaos: the background swirl was created with flour resist

Read my tips for working with resists

Read about working with sugar syrup as a resist

Read about working with acrylic medium as a resist

Read about working with oatmeal resist

Read about working with potato dextrin resist

Read about working with soy wax resist


Related Posts Plugin for WordPress, Blogger...