Showing posts with label Screenprinting. Show all posts

Tuesday, January 22, 2013

Screen Printing with Stencils, Part Two

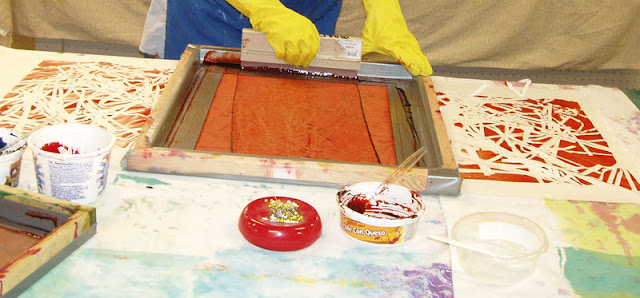
Last week I showed you some of the screen printing stencils I created with interfacing and acrylic paint. Today I have photos of stencils I created using resists. I use resists on silkscreens quite often. It is a great way to do deconstructed or breakdown printing, because as you apply the wet medium, the resist breaks down, changing the pattern as you work.  That can be a disadvantage, however, if you want a particular design and don't want the breakdown to occur. That's where the stencils come in.  I thought it would be a good way to create a design that can be used indefinitely. The resist is applied to the stencil. When it dries, paint is applied over the open areas. Then the resist is washed off, leaving behind a pattern.

A little warning: the process is not for the faint of heart. Depending on which resists you use, it can be difficult to wash the resist out of the interfacing. I found flour paste and mashed potatoes particularly difficult to remove. It is also more time consuming than just applying paint to the interfacing. Depending on which resist you use, it can take 2 or three days to complete a stencil. Not good for those who want instant gratification.

If you want to try this yourself, two things to keep in mind.  First, the thickness of the interfacing does matter.  I prefer medium weight. Very thin interfacing becomes fragile when wet and tears easily.  Heavy weight interfacing absorbs so much dye or paint that it is hard to get a good print. Second, you may need to use several coats of paint to completely block the interfacing. 

The first stencil was created by applying flour paste resist with a spring whisk. The areas which had the flour paste become the open areas that the paint or dye goes through.

Flour paste resist


For this stencil, flour paste was applied to the entire piece of interfacing. Then a wire whisk was pressed into the flour to remove some of the paste.


The last flour paste sample I created is shown below. I applied flour paste to the entire piece of interfacing, then used a window chamois to remove some of the flour paste. The three stencils form a nice suite, don't you think?


Soy wax is a bit easier to wash out than flour paste. The stencil below was created by stamping the wax on the interfacing with a square sponge.


It is a bit difficult to see the above design in the sample, since it was created with several layers of stencil screen prints.


This stencil is one of my favorites, although it took forever to get all the mashed potatoes washed out. I applied instant mashed potatoes over the entire piece of interfacing. When it dried, the potatoes cracked into large chunks.


Have you tried  interfacing screen printing stencils? What were your results?

Tuesday, January 15, 2013

Screenprinting with Stencils

I've been creating a variety of stencils to use with a blank silkscreen.  I haven't done it in awhile and forgot how much fun it is! My goal was to come up with imagery for a new series. I learned about using interfacing as a stencil from Jane Dunnewold. The basic idea is to apply acrylic paint to the interfacing to block out a pattern.  Then you tape that to the back of a blank silkscreen. The paint or dye, when pulled through the screen, will not go through the areas that are painted. It is a convenient way to create a silkscreen without dedicating the screen to one image.

I also tried lutradur as an alternative to interfacing.  It is more open, so it doesn't work as well, although I did get some interesting patterns from it. I also used window sheer fabric. Below are some of the stencils I created and the corresponding print. I'll post part two (resists on interfacing stencils) once I get the photos taken.


Acrylic paint brushed through lace


Acrylic paint brushed through lace

Acrylic paint brushed through lace on lutradur

Acrylic paint brushed onto sheer polyester fabric


Thursday, August 9, 2012

Something New

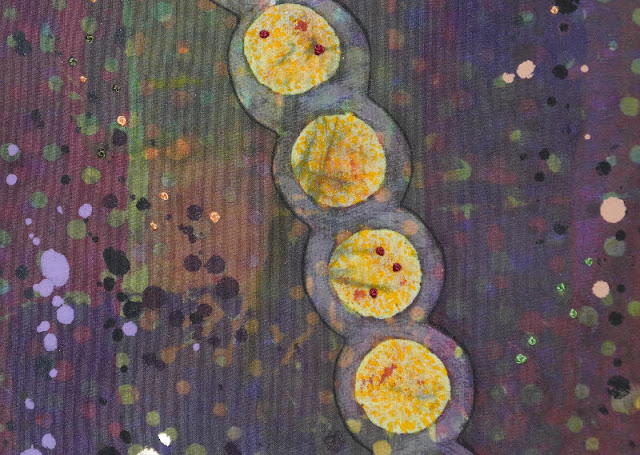
Earlier this summer I did a lot of screenprinting with dye and have many pieces in the works.  I finally finished one! It incorporates multiple layers of screenprinting with dye, screenprinting with paint, soy wax resist, hand stitching and metal leaf.


Now Points, 36" x 18", Cotton

I had a great time stitching the french knots. Lots and lots of single, double and triple french knots. I'm guessing there have to be at least 250 of them.This is one of those cases where I could easily have been carried away in the stitching.  I didn't want to stop! 


Now Points, detail
This piece was inspired by a quote I came across last year.

Time is not a line, but a series of now-points.
- Taisen Deshimaru


Thursday, July 19, 2012

A Rendezvous With an Old Love

A fluttering of excitement in the stomach. Shortness of breath. A touch of giddyness. That is how I feel as I work with silk screens in the studio.  I was on a self-imposed hiatus from screenprinting for a couple of years.  I wanted to eliminate the intermediary (silk screens and other tools) and apply color to cloth directly with my hands.

Looking back, I can't believe I gave up screen printing for such a long time.  For several years that's all I did.  No immersion, just screen printing with dye. I loved it. And I find that I still do.  I can't explain why, but I become completely immersed in the process.  Time flies. I don't want to stop.

Without intending it, my approach is a bit different now.  I'm trying new things. I guess I had gotten into a rut and now I'm looking at it with a fresh eye.  And now I'm combining screen printing with hand painting techniques.  The best of both worlds!

Until I got sidetracked by ice dyeing last week, I've been working diligently in the studio with my silk screens for the past month. Only one finished piece to show for it, but lots in progress. Here is a sneak peek. More photos will come as they are complete.


What is your surface design "love"?

Saturday, March 5, 2011

Design Transformation


I've been doing a lot of brayer printing lately and have a wonderful piece of lacy fabric that makes a great pattern.  I've heard a lot about PhotoEZ for screen printing and wanted to try it, so I decided to transform this image into a screen.


Lace fabric

The first step was to paint the lace with black craft paint so it would show up when I scanned it into the computer.  The resulting image came out with a lot of gray tones, so I manipulated it in my photo software so it was only black and white.


Then I decided to try the negative image to see what that was like.


I liked that better, so that is what I used to create the PhotoEZ screen. PhotoEZ is essentially a piece of mesh covered with photo emulsion.  The website makes it sound so easy, but I was skeptical. It actually was very easy and came out perfectly the first time.  Basically, you place a photocopy of the image on top of the emulsion covered mesh and let it sit in the sun for 5 minutes. (There is more to it than that, but it comes with complete directions.)

After washing out the softened emulsion, I had a screen ready to go.


Here is what the print looks like:


 I love the idea of creating screens with some of the unique patterns I get with brayer printing.  I think I'll be making a lot more of these.  I hope it is a sunny spring!

Monday, November 22, 2010

Layered Screenprinting


Last weekend I taught a class on screen printing at the Southwest School of Art in San Antonio.  It's a fun class that covers some of my favorite techniques.  I know, I know, I say that about every class. I guess I just don't sign up to teach techniques that I don't enjoy doing.
Anyway, the class focused on multiple layers of screen printing with dye and the use of resists to block out white space. We also layered sheer fabrics on top of each other so the printing would penetrate both layers.  The great thing about working with thickened dyes is that the fabric stays soft, and it's fun to see how the colors blend and interact as they are printed one on top of another.

We used soy wax and gel glue as a resist directly on the fabric and on the silkscreen.  We also used masks, such as shredded paper, leaves, masking tape and freezer paper stencils to create a pattern on the fabric.

I'm doing another class in January by special request. If you are intrigued by the photos below and are interested in taking the workshop, let me know and I'll keep you informed of the dates.


Screen printing with soy wax on the silkscreen

Multiple layers of screen printing with soy wax on the fabric and on the screen


Screen printing with shredded paper under the screen


Multiple layers with freezer paper masks


Adding background color


Multiple layers of printing with gel glue resist and a sequin waste stencil


Adding a leaf to round out the design

Sunday, June 28, 2009

Small Works


Here are photos of the smaller pieces I've been working on this past week. They are all stretched over a canvas frame and are 12" x 12" or 10" x 10". The first four are a series using silk organza with a variety of resist and screenprinting techniques. The image above, Fingerprints, employs flour resist, screenprinting and metal leaf.


Cell Dance, was created with several resists, paper lamination, screenprinting, metal leaf and appliqued organza.


The Colosseum, was created with several layers of flour paste resist, paper lamination and hand painted with silk dyes and paints.


Secret Whispers, was created with flour paste resist, soy wax resist, screenprinting, discharge and metal leaf.


Beginnings was created a year ago, and I finally got around to the beading. It is cotton, dyed and overdyed with a metal leaf image.


Cool Breeze, is one of the 10 x 10s. It is cotton that has several resists, screenprinting, and metal leaf.


I have a few more in the works, but need to get started on a class assignment, so I probably will abandon them for a few weeks.


Some of these pieces are available for purchase on the ArtCloth Studios website.
Related Posts Plugin for WordPress, Blogger...