Friday, March 11, 2011

Spring


When I lived in Chicago, the first robin was the sign that spring was coming.  In south Florida, spring wasn't much different than winter. I always dreaded late spring, because the weather would soon turn from glorious to hot and steamy. In Texas, it is the bluebonnets that herald in spring. In a good year, the beautiful blue-violet flowers blanket the sides of the roadway.   The local shops that cater to tourists are filled with photos and paintings of bluebonnets, so it is easy to take them for granted.  But all it takes to remember their beauty is one perfect bluebonnet and one moment to enjoy it. Last week, the first lone bluebonnet emerged from our new wildflower garden. I guess that means spring is officially here.

What is your "bluebonnet"?

Saturday, March 5, 2011

Design Transformation


I've been doing a lot of brayer printing lately and have a wonderful piece of lacy fabric that makes a great pattern.  I've heard a lot about PhotoEZ for screen printing and wanted to try it, so I decided to transform this image into a screen.


Lace fabric

The first step was to paint the lace with black craft paint so it would show up when I scanned it into the computer.  The resulting image came out with a lot of gray tones, so I manipulated it in my photo software so it was only black and white.


Then I decided to try the negative image to see what that was like.


I liked that better, so that is what I used to create the PhotoEZ screen. PhotoEZ is essentially a piece of mesh covered with photo emulsion.  The website makes it sound so easy, but I was skeptical. It actually was very easy and came out perfectly the first time.  Basically, you place a photocopy of the image on top of the emulsion covered mesh and let it sit in the sun for 5 minutes. (There is more to it than that, but it comes with complete directions.)

After washing out the softened emulsion, I had a screen ready to go.


Here is what the print looks like:


 I love the idea of creating screens with some of the unique patterns I get with brayer printing.  I think I'll be making a lot more of these.  I hope it is a sunny spring!

Wednesday, March 2, 2011

Boring to Beautiful


I taught a class on brayer printing last weekend at the Southwest School of Art.  The brayer is my new favorite tool.  Although I have used it for years, I've only recently come to fully appreciate what a versatile tool it is. It is a great way to transform fabric. It can be used with just about any medium, including paint, thickened dye, discharge agents and resists. You can achieve a variety of effects with a brayer all by itself. Then add some textured items into the mix and the possibilities are endless!


We started by comparing the marks made with a rubber brayer, a foam brayer and a napped brayer.  Then we add texture by placing items under the fabric and brayering over them.


This fabric was scrunched, then brayer printed with a rug gripper and a piece of lacy fabric underneath.


This fabric was brayer printed with rubber bands and egg noodles underneath.
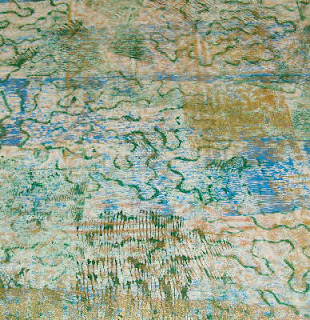

Detail view


A rubber brayer created the yellow background pattern and the fabric was scrunched before being brayered with purple.
A lot of these pieces looked different by the time class was finished, because we kept adding layers of printing and dye.

Cathy adds some background color with dye.


Here is how this piece looked Saturday morning.


And here is what it looked like on Sunday afternoon.

We also spent some time working with flour paste and gel glue resist.  The resists were brayer printed , then dye was either brayered or painted on.


Sarah applies flour paste resist with a foam wall roller.

I'll be teaching a one day version of Boring to Beautiful at the Quilt Festival in Houston this year.  Hope to see you there!


Related Posts Plugin for WordPress, Blogger...