Monday, January 31, 2011

Trying Something New

Ever since I started playing around with acrylic mediums to create texture on the edges of my collage-on-canvas, I have felt a pull to paint with them.  Now, I have never done any acrylic painting - just a little watercolor years ago.  It's the allure of texture - using gel mediums and modeling paste to create a 3D surface.  Up to now, it's just been that idea in the back of my head.  Then, at Quilt Festival, I bought the book, The Creative Edge, by Mary Todd Beam.  I also picked up Painting Abstracts by Rolina van Vliet. Both books have a number of exercises using acrylic paints. So, last week I gathered my supplies and got to work.


My first step was to cover several boards with gel medium and make marks on the wet gel to create texture.  I realized this was going to be expensive, because I was using a lot!  So I pulled out the wall patch compound and used that on some of the boards. I have one that has an acrylic base, which is important.  Without that, it will crack off the surface when it is dry. At least that has been my experience using it on the edges of canvas.

Beam recommends illustration board, but I used mat board since I have a lot on hand. After the medium/wall patch dried, I applied gesso so I would have a nice surface for painting.  Below are a few of my textured boards, ready to paint.


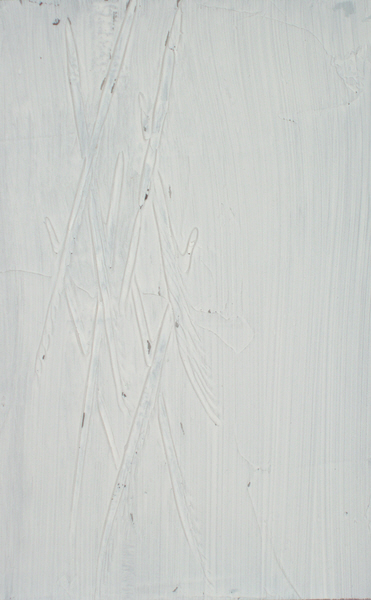
Scratches with a bamboo skewer


The medium was squeegeed through a piece of heavy lace.  Can't really see the lace pattern, but it has an interesting texture.


Here I used a spring whisk, part of a plastic ceiling grid and a skewer.

This is pretty much like using the sgraffito technique on flour paste, so I felt right at home creating these backgrounds.  Then I laid the first wash on one of them. That takes me back to my watercolor days. I love the soft effect even more with the textured background.  And when I paint over it, those colors won't bleed into the 2nd layer.


It's a slow going process, since I only have a short amount of time to devote to this right now.  But I like working in stages like this. And I know they don't look like much, but I am having so much fun doing this. The neat thing is that I don't really care what the end result is - I'm just enjoying the process!

Wednesday, January 26, 2011

Quilting Arts TV

I received some exciting news last week - I have been invited to participate in the taping of Quilting Arts TV next month. I now get to join the ranks of some of my favorite artists. The show airs on PBS in some markets.

I have been writing a series of articles for Quilting Arts magazine on resists from the kitchen, so they asked me to do a segment on that.  I'll cover oatmeal, instant mashed potatoes and rice cereal.  I'll also tape a segment on brayer printing. Below is a sneak preview of the results from some of the techniques.  No news yet on when they will air, but I'll pass it on when I know.


Circles and Squares, mashed potato resist, hand stitching 


Kundalini , brayer printing, hand stitching


Sunday, January 23, 2011

ArtCloth Network


108 Beads by Barbara Schneider


The ArtCloth Network, a group of artists dedicated to promoting the medium of cloth as an art form, is currently having a call for membership. I've been a member since 2008 and I joined to be part of a community of other artists working in this medium. Members of the network meet annually to share what they are working on and to discuss professional concerns and opportunities. Part of the group's mission is to educate people about artcloth and one of the ways in which we do that is to produce an artcloth exhibition for members each year.

I have enjoyed the opportunity to talk with others about techniques and processes, about art-related concerns and frustrations and about approaches to creating. The annual exhibition has provided deadlines that push me to create when I might not otherwise and it has also pushed me to create work outside my comfort zone.

If you are committed to creating artcloth and are interested in joining the group, you can read more about it in the membership application and requirements.

Friday, January 21, 2011

In Class

I spent last week in an Independent Study class with Jane Dunnewold.  Jane holds it every January and it has become a new year's ritual for me.  Many of us have been returning for 3-5 years. Everyone works on their own thing.  I find it a great way to jump start the new year and it is fascinating to see what everyone else is working on. I came away with a lot of finished cloth and a lot of ideas for more! Here are some photos of the week.


Leslie Jenison shows some of her Spoonflower fabric. It was like a guessing game trying to figure out what the original photo was.


A graffiti-inspired cloth by Leslie Jenison  


Linda Dawson works on her unique process for transferring color to fabric from paper.


The finished pieces


This almost-finished cloth is by Jeannette Davis.  At the beginning of the week, all she had was the original dyed fabric.  Everything else was done in class.


Diane Lopez displays her natural dyeing techniques.  This cloth has iodine (and some other unidentified substances as well!) Diane sells her beautiful scarves at Kathleen Sommers in San Antonio.


Vivian Mahlab works on layers of screenprinting


Another piece by Vivian


This is one of my layered resist pieces - 3 layers of soy wax and immersion dyeing.


This is three layers of potato dextrin resist, handpainted


Another one of my pieces - multiple layers of Jacquard resist and acrylic medium resist


Friday, January 7, 2011

What Is It I'm Really Teaching?

Another one of my wide-awake-at-four-in-the-morning ruminations. It struck me that not only does every instructor bring a different perspective to their teaching, I believe that we are really teaching something much more than is reflected in the catalog description. For example, I bet if I asked another local artist and instructor what is the essence of what she teaches, she would answer "tapping into one's creativity."  Each class may focus on a particular project or technique, but she is really sharing her enthusiasm for the creative process. Another instructor I know spends hours experimenting with new techniques and doing research on materials and techniques.  So she is not only an innovator, she has also developed a high level of knowledge and expertise that she is eager to share with students.

I began to ponder the essence of my teaching. I had a flash of knowing, but it is hard to articulate.   I guess what I really want people to come away with is the confidence to stick with it, to work through difficulties and to be open to new possibilities. It's easy to get frustrated when trying a new technique, especially if it doesn't turn out the way you think it will. There is a learning curve to everything, and some people move through the curve more quickly than others. (I know - I'm one of the slow ones!) My hope is that participants won't be discouraged by a "failure".  Failures can lead to interesting new possibilities!

Monday, January 3, 2011

Happy New Year!

Don't you just love the beginning of a new year?  So much hope, so many possibilities, a chance to wipe the slate clean and start over. I always feel fresh, energized, with renewed enthusisam for my goals.  And yet, why do I limit these feelings to the new year?  Everyday is an opportunity for a fresh start and I often forget that. One of my intentions this year (as it is every year!) is to take time each day to be in the moment, to release baggage from the past and anxiety about the future.  It is a difficult goal to achieve.  Sometimes I'll get through the whole day and realize I never stopped my mind long enough to just be. But I keep trying!

May you have many fresh starts this year, and many moments to enjoy the present!

Tuesday, December 28, 2010

January in San Antonio?


How about a 3 day retreat in sunny, warm San Antonio this January?  There are still a few spaces left in the Irresistible Texture workshop I am teaching at ArtCloth Studios on January 21-23.

Join us as we spend three days exploring water-based resists. This workshop is perfect for those who have been intrigued by the idea of resists, but weren't quite sure how to go about using them. Or maybe you have tried, with unsatisfactory results. You will have an opportunity to use resists made from everyday pantry items, as well as some commercially available resists. I'll also share 8 different techniques with which to apply them, so there is sure to be something for both the novice and the experienced. See the possibilities for yourself - from fresco-like texture to crisp, clear detailed images. Email me if you have any questions or would like to sign up.


Jacquard water based resist


Potato dextrin


Elmer's gel glue


Oatmeal


Flour paste, soy wax


Flour paste


Soy wax


Flour paste, soy wax

Wednesday, December 22, 2010

Is It Just Me?

Does anyone else feel that December has slipped by?  I had such high hopes for the month.  I was finished with my workshops for the year and most of my major deadlines were behind me.  I was looking forward to a full, unencumbered month to concentrate on my latest project.  Now I find myself with a week and a half left, wondering where the month went.  Maybe my expectations were too high?  (Me?? Never!!)

It's hard to shake off my past - after so many years in the corporate world, the idea that doing is more important than being is hard to change. For all the time I spent working on my projects this month, I also spent a lot of time enjoying my family, admiring the new wildflower garden, watching the birds at our bird feeder, playing with the kitties, and making gifts for the holidays. I've been reading Eckhart Tolle's A New Earth each morning, and was struck this morning by the idea presented in the last chapter.  It is not as important what you do, but how you do it.  The simplest things take on meaning when done with full attention and awareness. Maybe I did "accomplish" a lot after all.  I managed to find balance in a month that can be stressful and full of anxiety.

Whatever you have in store this week, may you also find balance between being and doing.

Wednesday, December 8, 2010

Prayer Flags

photo by broken sphere

I've been fascinated by prayer flags from the moment I first learned of them. Typically associated with Tibet,  these flags are hung outside and carry prayers - for protection, health, good fortune, compassion.  Each flag is printed with a combination of text and symbols. The text may be a mantra, a sutra (excerpt from a sacred Buddhist text) or a prayer.


photo by babasteve 

photo by markus koljonen

The aspect that really intriques me is the idea that as the flag becomes weathered, small pieces of the flag are carried off by the wind, spreading the prayers throughout the world. The prayers are also thought to purify and cleanse the air that blows through them. People often hang multiple flags and it is common to see both new and old flags hanging side by side. What a wonderful representation of the cycles of life, young and old side by side.  An acceptance of the natural life cycle, that as something dies and decomposes, it is providing benefit and sustenance for another being.

I have created several prayer flags this year.  My interpretation is quite different from the traditional version. The first had no text, only symbols I created to represent my prayers for the world.  The second set has no symbols, only text.  They both carry prayers for peace, joy, love, compassion and health.


This flag was made from hand-dyed linen that was then brayer printed.  A small bit of metal leaf was added to each piece.


These flags are made from silk/cotton voile.  I used the technique from Vibrant Color, I added powdered dyes to soy wax and applied that to the fabric, then handpainted over it. The prayers are screened in metal leaf.

Tuesday, November 30, 2010

Grits are Great!

After I blogged about oatmeal a few months ago, Gay Ousley commented that grits made a great resist. Grits aren't something I keep in my pantry, after a disappointing experience eating them a number of years ago, so I filed that information away for "someday".  Then I saw a recipe in the newspaper a few weeks ago for cheesy jalapeno grits.  Hmmm - cheese, butter, jalapenos - how could that be bad?  So I decided to try them - for breakfast and as a resist.

Now I am a full blown grits convert. Not only was the breakfast casserole great, I loved the pattern they created on cloth. I had no idea what sort of water to grits ratio to use, so I tried two versions on one piece of cloth. The left side was 1 package instant grits to1/4 cup water.  The right side was 1 package instant grits to 3/4 cup water. I love them both. Thank you, Gay for the suggestion! So, I see I need to do some more experimenting with grits. Off to the store, because I finished the last of them for breakfast!

Update 1/10/11 - The link to the grits recipe is no longer valid, so by request, I have included the recipe below. 

Cheesy Jalapeno Grits (recipe from the San Antonio Express-News)

2 cups quick cooking grits
1 1/2 cups sharp cheddar cheese
1 stick unsalted butter
3 teaspoons Tabasco sauce
3 large eggs, well beaten
2 jalapenos, finely diced
1/4 cup chopped canned green chiles
Garlic, salt to taste

Heat oven to 350 degrees. Cook the grits according to package directions. Remove from heat and add remaining ingredients. Stir well.  Pour into buttered 9 inch baking dish.  Bake for 1 hour. Cool slightly before serving.

I've omitted nutrition information.  You really don't want to know!


Thursday, November 25, 2010

Thanksgiving


Another Thanksgiving Day. Rather than the typical dose of turkey, potatoes, stuffing and family, I usually spend Thanksgiving in the studio. For the past 6 years, my husband has had to work on Thanksgiving, so I have started my own tradition. It seems appropriate - what more to be thankful for than a day alone creating? I usually take a more relaxed pace on this day. Yes, I work in the studio, but I take a break to play with the kitties and read the paper. Today, I spent some time admiring our new wildflower garden. We planted it a few months ago and the weather has been so warm, the flowers are blooming!

Now don't feel sorry for me, we had our Thanksgiving feast yesterday. And boy it was delicious. So now, while my husband works, I get to have lots of leftovers. (Don't feel sorry for him, either. His employer treats him to a Thanksgiving meal at a very nice local restaurant.)

I'll take a pass on reciting a list of all that I am thankful for. Somehow it ends up sounding trite.  I'll just wish you all a happy Thanksgiving and a very enjoyable day.

Monday, November 22, 2010

Layered Screenprinting


Last weekend I taught a class on screen printing at the Southwest School of Art in San Antonio.  It's a fun class that covers some of my favorite techniques.  I know, I know, I say that about every class. I guess I just don't sign up to teach techniques that I don't enjoy doing.
Anyway, the class focused on multiple layers of screen printing with dye and the use of resists to block out white space. We also layered sheer fabrics on top of each other so the printing would penetrate both layers.  The great thing about working with thickened dyes is that the fabric stays soft, and it's fun to see how the colors blend and interact as they are printed one on top of another.

We used soy wax and gel glue as a resist directly on the fabric and on the silkscreen.  We also used masks, such as shredded paper, leaves, masking tape and freezer paper stencils to create a pattern on the fabric.

I'm doing another class in January by special request. If you are intrigued by the photos below and are interested in taking the workshop, let me know and I'll keep you informed of the dates.


Screen printing with soy wax on the silkscreen

Multiple layers of screen printing with soy wax on the fabric and on the screen


Screen printing with shredded paper under the screen


Multiple layers with freezer paper masks


Adding background color


Multiple layers of printing with gel glue resist and a sequin waste stencil


Adding a leaf to round out the design

Sunday, November 7, 2010

Just Have Fun

I'm back from a whirlwind trip to the Quilt Festival in Houston.  This was my first time teaching.  I had two demos and three classes, so it was pretty hectic. I spent the previous two weeks creating handouts, boxing up my supplies (all 14 boxes), making fabric samples and trying to stay sane. 

When I arrived for my first class on Thursday, I was a bit frazzled, having just driven the 3 hours from San Antonio, and unloaded everything into the teacher's room.  After I set up for class, I had some extra time, so I sat quietly to try to center myself.  As I did, a voice in my head said "just have fun."  I smiled and realized, "Yes!  I don't need to worry about anything - I love what I do and I'm here to share that with others and enjoy it!"   My perspective shifted in that instant.  And I did have fun.  It was exhausting, grueling and hard on my feet, but it was also exhilarating, inspiring, and a blast!

I met so many wonderful people, saw some amazing quilts and got a boost of creative inspiration. I'm going to stay on that high for today.  Unpacking all those boxes can wait until tomorrow!

Sunday, October 31, 2010

Transforming Fabric

I've been creating some samples of brayer printed fabric for a demo I'm doing at the Quilt Festival in Houston this week.  I've always loved the patterns you can get, but I never before thought about using brayer printing to transform my fabric "duds".  It's amazing how different the fabrics look after brayer printing.


Before: Interesting patterning, but not my colors


After: Much more interesting surface and a more subdued palette!


Before: A soy wax experiment gone wrong


After: The squiggles are hardly noticeable, and the new patterning and color are a big improvement.


Before:  Nice colors, but the double mandala was not effective.


 After: How did I get one focal point out of that? Amazing.

If you are going to the Quilt Festival, maybe our paths will cross.  (Sure, among the many thousands who will be there, right?!)  The brayer printing demo is part of the Friday Morning Sampler, which is full, so if you can't stop by then, look for my article on brayer printing in the Dec/Jan issue of Quilting Arts.


Related Posts Plugin for WordPress, Blogger...